
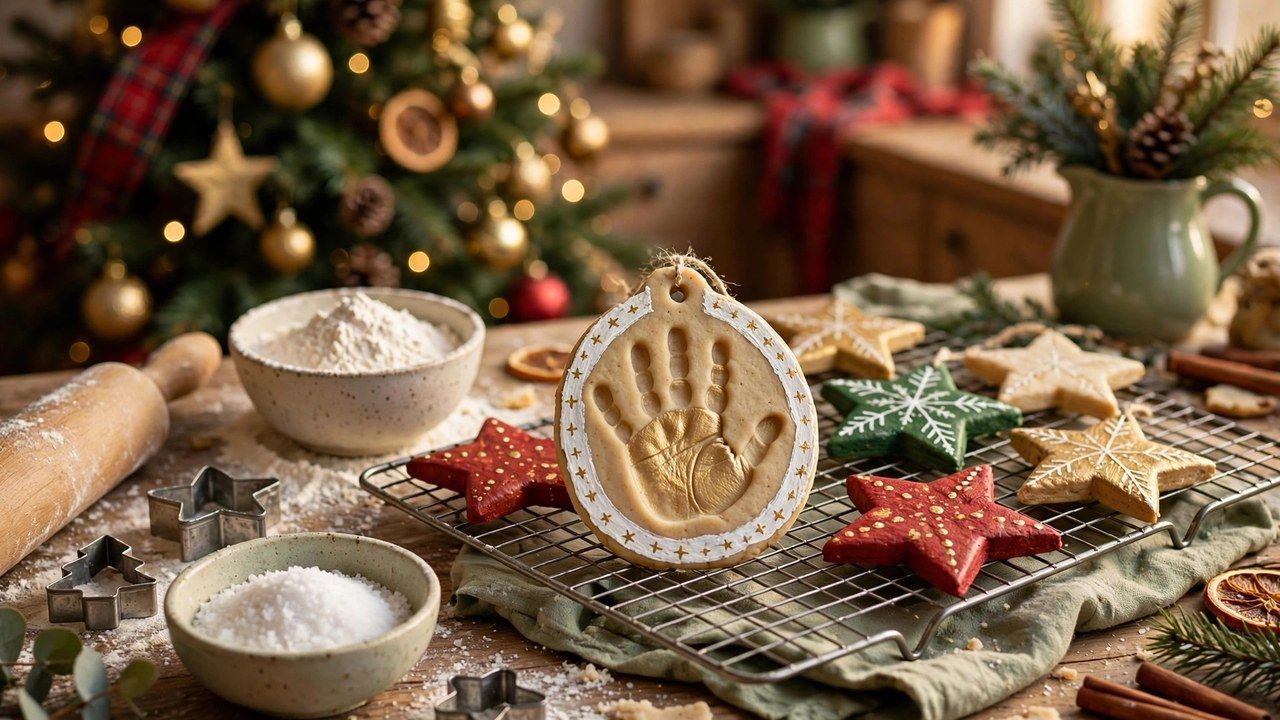
Salt dough is the keepsake craft that grandmothers made, nurseries still swear by, and grown adults get unexpectedly emotional about when a painted handprint comes out of the storage box. The recipe has survived because it is almost absurdly simple: flour, salt and water, mixed in a two to one to one ratio, rolled, cut, dried slowly, then painted and sealed. This salt dough ornaments recipe gives the full method, the real drying times, the troubleshooting for every way it goes wrong, and the finishing steps that decide whether an ornament lasts one Christmas or thirty.
Salt dough is the anchor project of our DIY Christmas ornaments guide, where it sits alongside felt, wood and cinnamon dough. One safety note before the flour comes out, because it shapes how you work: salt dough is a craft material, not food. Its very high salt content makes it dangerous for dogs and unappealing but still unwise for small children to eat, so make it, dry it and store it the way you would any craft supply, out of reach of pets.
The Recipe: Ingredients and the 2-1-1 Ratio
Makes: roughly a dozen medium ornaments, depending on cutter size and thickness. Ingredients: 2 cups (about 250 g) plain all purpose flour, plus extra for dusting; 1 cup (about 300 g) fine table salt; up to 1 cup (240 ml) warm water, added gradually. That is the classic ratio: two parts flour, one part salt, up to one part water. Fine salt matters, because coarse salt leaves a pitted, grainy surface that paint cannot rescue, and warm water helps the salt dissolve into a smoother dough.
The salt is doing three jobs: it preserves the dough so ornaments resist mold, it adds the weight and stone like hardness that makes finished pieces feel like ceramic, and it keeps the dough from being a foodstuff anything wants to nibble. Do not be tempted to reduce it for a lighter dough; low salt versions dry softer, crack more and store badly. If you only remember one line from this recipe, remember the ratio, because every other variable can be adjusted around it.
Step by Step: Mixing, Kneading, Rolling and Cutting
- Mix the dry ingredients in a large bowl, flour and salt together, breaking up any salt lumps.
- Add water gradually, stirring, then working the dough with your hands once it comes together. You may not need the full cup; stop when the dough is firm and smooth, like play dough, never sticky.
- Knead for five to ten minutes on a floured surface until completely smooth. This step decides your surface quality; under kneaded dough dries rough and cracks.
- Roll out evenly to about a quarter inch (roughly 6 mm) thick. Even thickness is the secret to flat, uncracked ornaments.
- Cut shapes with cookie cutters, pressing straight down. The same cutters that shape the pieces in our Christmas cookie recipes work perfectly here. For handprints, roll a thick circle and press the hand firmly and evenly into it.
- Make the hanging hole now, pushing a drinking straw through near the top of each shape and giving it a tiny twist. Holes cannot be added after drying.
- Smooth edges with a damp fingertip, transfer shapes to a lined baking sheet, and rest them while the oven heats.
Work with a production mindset if children are helping: adults roll and manage thickness, children cut and decorate the raw shapes with stamp patterns, fork marks or the end of a straw pressed as polka dots. Patterns pressed into raw dough survive painting beautifully, especially when you later brush paint into the grooves and wipe the surface, an antiquing trick that makes simple shapes look genuinely crafted. Our family activities guide has more projects that divide jobs by age this gracefully.
Drying Method One: Low and Slow in the Oven
Oven drying is the reliable route. Heat the oven to its low range, around 200 to 250 degrees Fahrenheit (about 100 to 120 degrees Celsius), and bake the ornaments for two to three hours, turning them halfway, until they are hard, dry and sound hollow when tapped. Thicker handprint pieces can need longer; patience is the recipe. The oven must stay low: a hot oven cooks the outside first, trapping steam that puffs, bubbles and browns the dough, ruining the pale ceramic look you want for painting.
Let ornaments cool completely on the tray before moving them, because warm salt dough is at its most fragile. Test dryness honestly: a piece that feels cool or slightly soft in the center is not done, and painting a damp center seals moisture inside, which can mold or crack weeks later in storage. When in doubt, give the batch another half hour at the lowest setting; over dried salt dough is a myth at these temperatures.
Drying Method Two: Air Drying, and How the Methods Compare
| Method | Time | Result | Best for |
|---|---|---|---|
| Low oven | 2 to 3 hours plus cooling | Hardest, flattest, most predictable finish | Keepsakes, handprints, batches on a schedule |
| Air drying | 48 to 72 hours or more, turning daily | Equally hard if fully dried; slight warp risk | Thick pieces, no oven access, unhurried projects |
| Combination | 24 hours air, then 1 hour low oven | Gentle on thick handprints; finishes the center | Thick or precious pieces you cannot risk |
Air drying suits thick handprints and households avoiding a long oven run: lay pieces on parchment over a rack so air reaches both sides, and turn them once a day. Never microwave salt dough to speed it up; it puffs and scorches unevenly and teaches nothing but regret. Whichever method you chose, the ornament should rest a further day before painting if you can bear it, which is the same patience principle behind the best bakes in our gingerbread cookies recipe, a genuinely edible cousin of this craft.
Painting, Detailing and Sealing for Keepsakes That Last
Acrylic paint is the standard finish: opaque, quick drying and bright. Paint in thin layers rather than one thick coat, let colors dry between details, and use paint pens for faces, names and fine lines. Painting the edges and back too, even plain white, gives a finished, ceramic feel and seals the surface evenly. Add the year and the maker’s name on the back in fine pen before sealing; in ten years that inscription will be the most valuable paint on the ornament.
Sealing is the step that converts a craft into a keepsake. Brush or spray a clear craft sealer or varnish over the whole piece, front, back and edges, once paint is bone dry, and let it cure as the product directs. Two thin coats protect better than one thick one. Sealed ornaments resist the humidity of storage and handling year after year; unsealed ones slowly absorb moisture, dull, and can soften. Glitter, if you must, goes on before sealing and gets sealed in, which keeps your storage box from becoming a glitter distribution system. Finished pieces you are giving away pair beautifully with the presentation ideas in our DIY Christmas gifts guide.
Keepsake Ideas: Handprints, Paw Prints and Annual Traditions
The handprint is the iconic salt dough keepsake: a thick circle, a small hand pressed firmly, the name and year inscribed with a skewer before drying, then painted in one color with the print picked out in a second. Make one per child per year and you are building the collection that empties a room’s composure in about 2040. Footprints work for babies who will not uncurl their fingers, and a thumbprint from each family member arranged as reindeer or baubles makes a group keepsake for grandparents.
Paw print ornaments come with a firm rule: a dog’s paw may touch the dough briefly for the print, with the paw washed straight after, but the dough itself, raw or dried, must never be left where a dog can chew it, because the salt load is genuinely dangerous to dogs. Store finished paw ornaments high and boxed. That caution sits alongside the wider pet safety guidance in our Christmas gifts for dogs guide.
Troubleshooting: Puffing, Cracking, Bubbles and Stickiness
Puffing or rising: the oven was too hot, or the dough was too thick; lower the temperature, roll thinner and more evenly. Cracking: usually under kneading, uneven thickness, or drying too fast; knead the full time and keep heat low. Bubbles: air pockets rolled into the dough; knead thoroughly and prick visible bubbles with a pin before drying. Sticky dough: too much water; knead in flour a spoonful at a time. Crumbly, dry dough: too little water; add warm water a teaspoon at a time and knead well between additions.
Grainy surface: coarse salt or undissolved salt; use fine table salt and warm water, and knead longer. Warping in air drying: turn pieces daily and dry on a rack so both sides dry evenly. Almost every failure traces back to one of three causes, thickness, temperature or kneading, which is good news: the recipe only has three dials, and your second batch will prove you have learned them all.
Storage, Longevity and Honest Expectations
Store sealed ornaments wrapped in tissue in a dry box, indoors rather than in a damp garage or attic, and they will last for many years, often decades. Check the box each year as you unpack; any piece that feels soft or smells musty has absorbed moisture and should be dried out in a low oven before returning to the tree, or retired if it has cracked. The wider system in our Christmas storage and organization guide keeps the whole decoration collection in the same good order. Unsealed pieces stored damp are the ones that fail, which is why the sealing step in this recipe is not optional decoration.
Honest pros and cons: salt dough is nearly free, uses what is already in the kitchen, and produces heirloom grade keepsakes; in exchange it asks for real time, a slow oven run and a drying schedule that cannot be hurried, plus disciplined storage and pet awareness forever after. For a handprint you will hand to a grown child one day, that is a trade every maker we know accepts gladly.
Conclusion
Two parts flour, one part salt, up to one part water, kneaded smooth, rolled evenly, dried low and slow, painted with love and sealed properly: that is the whole recipe, and it has carried family Christmases for generations. Respect the ratio, the thickness and the drying time, write names and years on the back, and store the results dry. Your future self, opening that box in a decade, will be very glad you did.