
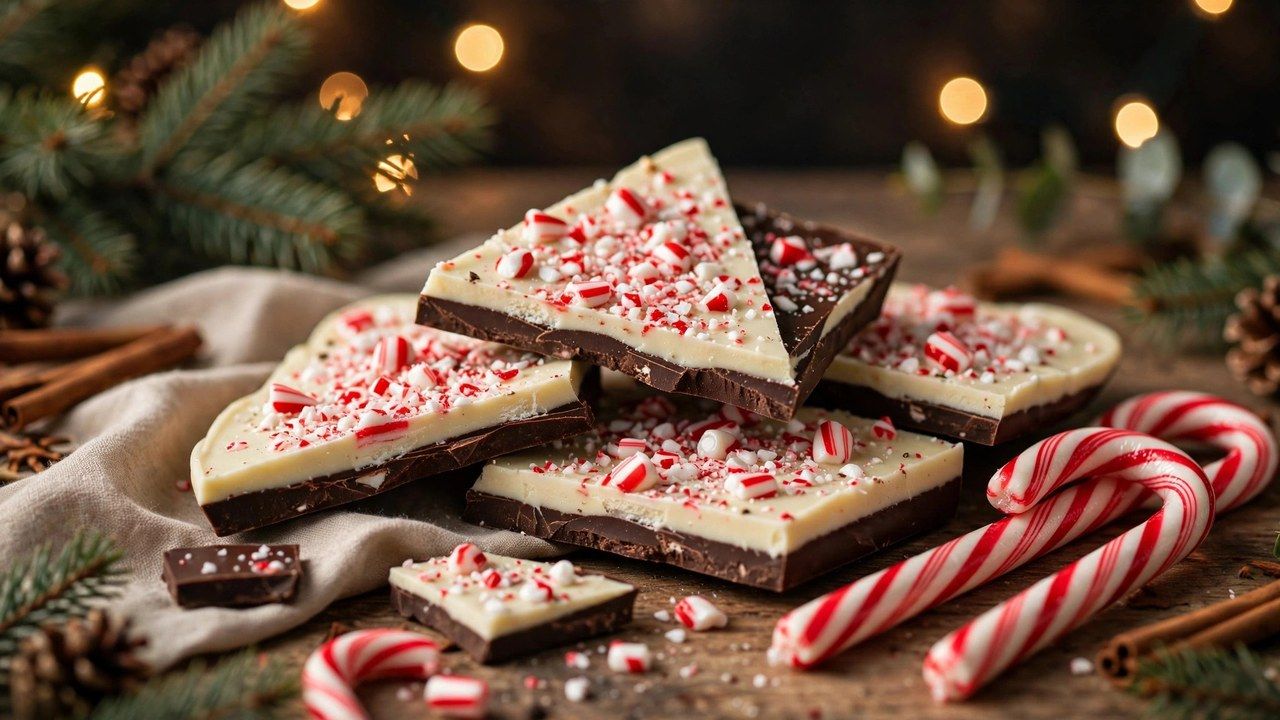
Peppermint bark is the rare holiday recipe that is both a treat and a gift strategy. Two layers of chocolate, a whisper of peppermint and a snowfall of crushed candy cane become, once broken into shards, the most packable homemade present of the season. This peppermint bark recipe focuses on the two things that decide success: chocolate that sets with a snap, and layers that stay together when you break them.
Bark belongs to the same family as the fudge and truffles in our homemade Christmas candy guide, and it is by far the easiest member of that family. There is no thermometer, no baking and no decorating skill involved. There is only melting, spreading, patience and one technique note about white chocolate that saves the whole batch.
Ingredients (Makes About 1 1/2 Pounds)
- 12 ounces (340 g) dark or semisweet chocolate, chopped, or good-quality chips
- 12 ounces (340 g) white chocolate, chopped, or good-quality chips (look for cocoa butter in the ingredients)
- 1/2 teaspoon peppermint extract, divided
- 5 to 6 standard candy canes, crushed, about 1/2 cup pieces
- Pinch of fine salt (optional, for the dark layer)
Ingredient honesty matters here because there is nowhere to hide. The bark is essentially chocolate, so chocolate you enjoy eating plain is the correct choice. White chocolate made with cocoa butter melts smoother and tastes like vanilla and cream; coating made with vegetable oils works, but sets waxy and tastes flatter. Peppermint extract, not mint extract, is the flavor you want; mint alone can taste like toothpaste against chocolate.
Step-by-Step Method
1. Prepare the pan. Line a rimmed baking sheet, about 9 by 13 inches, with parchment, letting it overhang the ends. 2. Crush the candy canes in a sealed bag with a rolling pin, leaving a mix of small pieces and a little dust; sift out most of the finest dust so the top stays clean and red rather than pink. 3. Melt the dark chocolate in a heatproof bowl over barely simmering water, or in the microwave in 20-second bursts, stirring until just smooth. Stir in 1/4 teaspoon of the peppermint extract and the salt.
4. Spread and set briefly. Pour the dark chocolate onto the parchment and spread it into an even layer about 1/4 inch thick. Let it set until it looks matte at the edges but is still slightly tacky in the center, about 10 minutes at room temperature. 5. Melt the white chocolate the same way, gently; white chocolate scorches and seizes more easily than dark. Stir in the remaining 1/4 teaspoon extract, let it cool 2 minutes so it does not melt the layer beneath, and spread it over the dark layer. 6. Top and chill. Sprinkle the crushed candy cane immediately and press very lightly. Refrigerate about 30 minutes, until fully firm, then break into shards with your hands.
The Two Failures, and How to Avoid Them
Layers separating is the classic bark failure, and it happens when the dark layer sets completely hard and cold before the white layer goes on; the two chocolates then have nothing to bond with. The fix is timing: the dark layer should be set at the edges and just tacky in the middle. If you missed the window, a minute in a warm oven to soften the surface can rescue the bond. Bloom, the grey streaks that appear on stored chocolate, comes from temperature swings; it looks tired but is safe to eat, and it is prevented by cooling the bark steadily and storing it in a cool, stable place.
Seized chocolate, thick and grainy, is caused by even a drop of water or by overheating. Melt in a dry bowl, keep steam out, and work gently with white chocolate especially. Seized chocolate cannot be re-melted smooth, but it can still be stirred into hot milk or a brownie batter, so a failed batch becomes an ingredient rather than a loss.
Thickness, Texture and the Snap
| Layer choice | Result | Best for |
|---|---|---|
| Thin, about 1/4 inch total | Crisp snap, delicate shards | Gift bags and dessert tables |
| Thick, about 1/2 inch total | Chewy-firm bite, chunky pieces | Cookie boxes and snacking |
| Swirled top layer | Marbled look, mixed flavor | Serving on a platter |
For the swirled variation, drizzle a few spoonfuls of reserved dark chocolate over the white layer and drag a toothpick through it once or twice before adding the candy cane. Restraint is the technique; over-swirling turns the pattern muddy. However you spread it, aim for even thickness at the edges, because thin edges shatter into crumbs while thick corners break cleanly.
Variations Worth Making
Dark chocolate only: skip the white layer, double down on peppermint and finish with flaky salt for an adult version. Cookie crunch: scatter crushed chocolate sandwich cookies with the candy cane. Mocha bark: add 1 teaspoon instant espresso to the dark chocolate and skip the candy topping, finishing with cocoa nibs or chopped nuts instead. Pretzel bark: press small pretzel pieces into the top for a sweet-salty shard that travels especially well.
Each variation respects the same structure: a firm base, a flavor that cuts the sweetness, and a topping added while the surface is wet. If you are building a full candy gift box, pair the bark with the ideas in our Christmas dessert recipes collection and the cookies from our cookie recipes collection for contrast in texture.
Packaging Bark as a Gift
Bark was born to be gifted because it needs no refrigeration, survives a few days in the mail, and looks abundant in any container. Line a tin, box or cellophane bag with parchment or tissue, layer the shards with parchment between them so the candy tops do not scuff, and finish with a simple tag saying what it is and when it was made. A small bag of bark tied to a bottle, a book or a mug turns a modest present into a homemade one.
Timing is your quality control: bark tastes freshest in its first two weeks, though it keeps longer. Make it in the middle two weeks of December for gifts, and keep one small bag back for your own kitchen, because the cook who gifts every shard regrets it by December 27th. Label nut variations clearly for recipients; it takes seconds and it is basic kindness.
Storage and Honest Notes
Store bark in an airtight container in a cool place for up to 2 weeks, with parchment between layers. Refrigeration works but can dull the surface and invite condensation when the bark comes back to room temperature, so a cool pantry beats the fridge unless your kitchen is warm. Keep it away from strong smells; chocolate absorbs them quietly and completely.
Pros: no baking, no thermometer, endlessly giftable, and genuinely hard to ruin once you respect the layer timing. Cons: it is only as good as the chocolate you buy, white chocolate is fussy to melt, and the candy cane topping softens and gets sticky in humid storage. Make it, gift it promptly, and do not hoard it, and none of the cons will matter.
Conclusion
Peppermint bark succeeds on two decisions: buy chocolate you like eating, and catch the dark layer while it is still tacky so the layers bond. Everything else is melting and patience. Break it into generous shards, bag it with a tag, and you have the easiest homemade holiday gift in this entire collection.