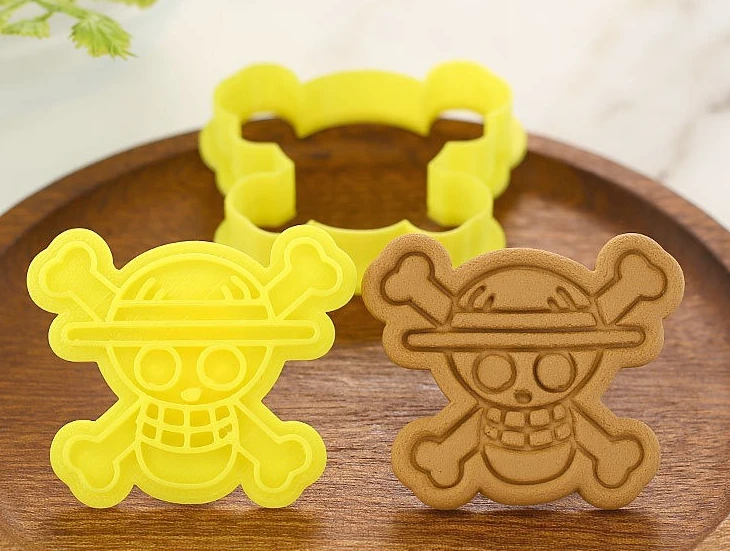

Every December, the same disappointment repeats: a sugar cookie cut as a crisp little tree comes out of the oven as a round green blob. This Christmas sugar cookies recipe is built to prevent exactly that. The dough uses cold-but-workable butter, a measured flour ratio and a short chill, so the cut-outs that hold their shape in the cutter are the same shapes on the cooling rack. Find the matched cutter in the shop section below.
Sugar cookies are the decorating cookie, the one that carries the icing art at a cookie exchange party and fills most of the boxes in our Christmas cookie recipes collection. That job demands a plain, sturdy, vanilla-forward base that does not compete with the icing. This recipe delivers that base, plus an honest guide to where cut-out cookies usually go wrong.
Why Cut-Outs Spread, and How This Recipe Stops It
Spreading has three main causes: butter that is too warm, too little flour for the fat in the dough, and baking powder or soda in amounts meant for drop cookies. This recipe answers all three. The butter is softened only until it dents under a finger, never greasy. The flour is measured generously and the leavening kept modest, just enough for a tender bite rather than a puff. And the cut shapes chill before baking, so the butter enters the oven cold and the edges set before the fat can run.
The honest trade-off: a no-spread dough is a touch less puffy and delicate than a drop sugar cookie. That is the correct exchange. You are choosing definition and a flat decorating surface over loft, and for a Christmas cut-out, definition is the whole point.
Ingredients (Makes About 36 Cookies)
- 2 3/4 cups (345 g) all-purpose flour, plus more for rolling
- 1 teaspoon baking powder
- 1/2 teaspoon fine salt
- 1 cup (225 g) unsalted butter, just softened
- 1 cup (200 g) granulated sugar
- 1 large egg plus 1 egg yolk, at room temperature
- 2 teaspoons vanilla extract
- 1/2 teaspoon almond extract (optional, but lovely)
For royal icing: 4 cups (480 g) powdered sugar, 3 tablespoons meringue powder and 9 to 10 tablespoons lukewarm water, beaten 4 to 5 minutes until smooth and glossy. Divide and tint with gel color, which will not thin the icing the way liquid color can.
Step-by-Step Method
1. Whisk the dry ingredients: flour, baking powder and salt. 2. Cream butter and sugar for about 2 minutes, just until combined and slightly lighter; over-creaming whips in air that later expands and blurs edges. 3. Beat in the egg, yolk and extracts until smooth. 4. Mix in the dry ingredients on low, stopping as soon as the dough comes together.
5. Chill 1 hour. Shape the dough into a flat disk, wrap and refrigerate. 6. Roll to 1/4 inch between two sheets of parchment if your kitchen is warm; this avoids adding extra flour, which toughens cookies. Cut shapes, transfer to parchment-lined sheets, and chill the cut shapes 15 minutes. 7. Bake at 350°F (175°C) for 8 to 10 minutes, until the edges look set and matte and the centers are pale. Do not wait for browning; a browned edge means a crisp, drier cookie. Cool completely before icing.
Royal Icing, Explained Simply
| Consistency | How it behaves | Use it for |
|---|---|---|
| Stiff | Holds a peak | Details, dots, writing |
| Medium (15-second) | A ribbon melts back in 15 seconds | Outlines that flood themselves |
| Flood | Melts flat in 8–10 seconds | Filling large areas smoothly |
The beginner-friendly method is one medium consistency for everything: outline a section, immediately fill it, and nudge the icing into the corners with a toothpick. Work one cookie at a time and keep the bowls covered with a damp cloth, because royal icing crusts over in minutes when exposed to air. Let flooded cookies dry uncovered for at least 6 hours, ideally overnight, before stacking or packaging.
Flavor Variations That Still Hold Their Shape
The base dough accepts flavor changes as long as you do not change its moisture. Lemon: add 1 tablespoon finely grated lemon zest with the sugar. Spiced: add 1 teaspoon cinnamon and a pinch of nutmeg to the dry ingredients for a snickerdoodle-leaning cut-out. Chocolate: replace 1/3 cup flour with 1/3 cup cocoa powder, keeping the total dry volume the same. Peppermint: swap the almond extract for 1/2 teaspoon peppermint extract and finish with crushed candy cane on wet icing.
What not to do: add citrus juice, jam or extra liquid flavorings to the dough itself. Liquid is the enemy of a sharp edge. Put bright, wet flavors in the icing or a glaze instead, where they belong. For a deeply spiced contrast batch, bake our gingerbread cookies recipe on the same day; the two doughs share a chill schedule nicely.
Decorating Plan for Real Kitchens
Limit the palette before you begin: white, red and one green cover almost every classic design, and three colors of icing is a manageable afternoon while seven is a production. Simple wins include white snowflakes on pale cookies, red and white striped candy shapes, and green trees with dot ornaments piped in white. Sprinkles go on while the icing is wet; details go on after a flooded base has crusted for about 20 minutes.
Set up like a small assembly line: undecorated cookies, icing bags, a tray for drying. Finished cookies need flat, undisturbed drying space, which is the resource most home bakers underestimate. A shaped cutter, like the pick in our shop section, keeps sizes consistent so cookies dry, stack and box evenly.
Storage, Freezing and Shipping
Undecorated cookies keep in an airtight container at room temperature for up to a week and freeze for up to 3 months. The dough itself freezes as a disk for 3 months; thaw overnight in the refrigerator. Decorated cookies, once the icing has dried a full 24 hours, stack between sheets of parchment and keep about a week at room temperature.
For shipping, choose sturdy shapes without thin necks or points, which snap in transit no matter how well you pack. Wrap pairs back to back in a small bag, cushion the box so nothing moves, and ship early in the week so the box never spends a weekend in a warehouse.
Troubleshooting and Honest Notes
Dough cracks when rolling: it is too cold straight from a long chill. Let it stand 5 to 10 minutes, then roll; if it still cracks, knead it briefly with warm hands. Cookies puff and blur: the butter was too warm or the cream step ran too long. Icing has bubbles: beat on low and let the icing rest 15 minutes, then pop surface bubbles with a toothpick as you flood. Colors bleed: the base layer was still wet when the detail went on; patience fixes it.
Pros: true no-spread shapes, a flat icing canvas, dough that freezes ahead. Cons: the chill steps mean this is a plan-ahead bake, and royal icing needs several hours to dry before gifts can be boxed. Neither con can be removed without giving back the shape you came for.
Conclusion
Cut-outs that hold their shape are not luck; they are temperature, ratio and patience, applied in that order. Keep the butter cool, measure the flour honestly, chill twice and pull the trays while the centers are still pale. Do that, and the tree you cut is the tree you decorate, every single tray.